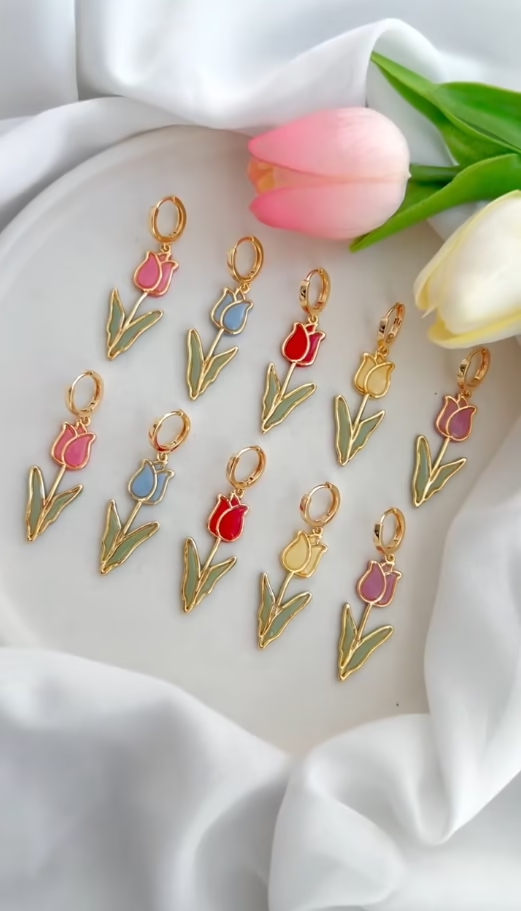
Spring is in the air, and what better way to celebrate than with some custom floral accessories? These tulip huggies are a fantastic introduction to combining polymer clay with resin, giving you a professional, high-end finish that looks like it came straight from a boutique!
Materials You’ll Need:
1. Polymer clay in various pastel shades (pink, blue, yellow, etc.)
2. Tulip-shaped gold wire frames or charms
3. UV Resin (clear)
4. Liquid resin pigments or alcohol inks
5. A sharp craft knife or needle tool
6. UV lamp for curing
7. Gold huggie earring hoops
8. Tweezers and a rolling tool
Step-by-Step Guide:
Prep the Base: Roll out thin, even sheets of polymer clay in your chosen colors.
Set the Frames: Gently press your gold tulip frames onto the clay. Use your rolling tool to lightly embed the wire into the clay so it’s flush with the surface.
Trim the Excess: Using a sharp craft knife, carefully cut around the outside of the tulip frame. Remove the excess clay to leave a perfectly shaped floral base.
Add the “Stained Glass” Effect: Apply a thin layer of clear UV resin within the sections of the tulip cap. You can mix in a tiny drop of pigment for a semi-transparent, vibrant look.
Cure the Resin: Place your tulips under a UV lamp for 2-3 minutes until the resin is hard and glossy.
Final Assembly: Once cooled, attach your beautiful tulip charms to gold huggie hoops. You now have a pair of custom, botanical earrings ready to wear!