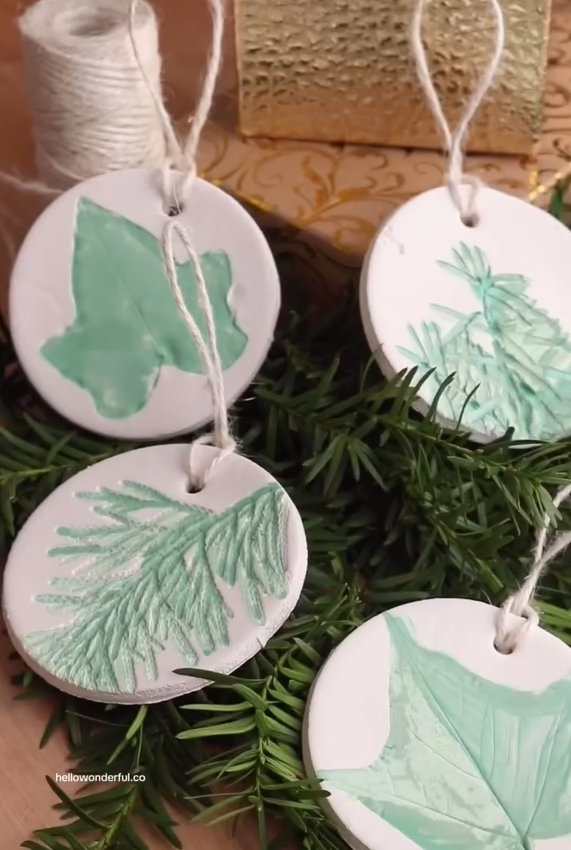
Looking for a relaxing way to get creative and celebrate the beauty of the outdoors? These botanical clay ornaments are one of those perfect, low-stress projects that look incredibly high-end with very little effort. Step outside, grab a few leaves from your garden, and let’s make some gorgeous, earthy decor!
Materials Required:
1.Air-dry clay (or alternatively, oven-bake clay)
2.Fresh leaves, ferns, or botanical cuttings (ensure they have distinct veins)
3.A rolling pin
4.Parchment paper
5.A round cookie cutter (or the edge of a glass)
6.A plastic straw
7.Green watercolor or acrylic paint along with a small paintbrush
8.Twine or ribbon
Step-by-Step Instructions:
1.Prep Your Clay: Begin by placing a sheet of parchment paper on a flat surface and roll out your clay until it achieves a smooth consistency and reaches a thickness of approximately 1/4 inch.
2.Press the Leaves: Position your fresh leaves and ferns with their surfaces facing down onto the clay. Cover them with another sheet of parchment paper, and gently roll your rolling pin over it to firmly imprint the botanical textures into the clay.
3.Reveal and Cut: Carefully remove the top layer of parchment paper and lift the leaves to unveil your exquisite nature impressions! Subsequently, utilize a round cookie cutter to cut out circles directly over the most attractive sections of the leaf designs.
4.Punch a Hole and Dry: Employ a plastic straw to create a small hole near the top of each circle. Allow the ornaments to dry thoroughly (or bake them, depending on the type of clay utilized).
5.Paint and Hang: After the clay has completely dried and hardened, take a small brush to delicately paint the leaf indentations with green paint to enhance the textures. Finally, thread a piece of twine through the hole and secure it with a knot.