The trees you see in boutique windows and hotel lobbies aren’t about having more ornaments. They’re about layering: wide ribbon, carefully placed oversized pieces and a topper that sets the tone. These Christmas tree decorating ideas walk you through that designer method step by step, so your tree at home looks just as full and polished.
This guide uses a rich palette of deep emerald velvet, burgundy, antique gold and soft champagne, but the technique works with any color scheme. Set against warm wood furniture or a dark painted wall, the jewel tones glow under the lights.
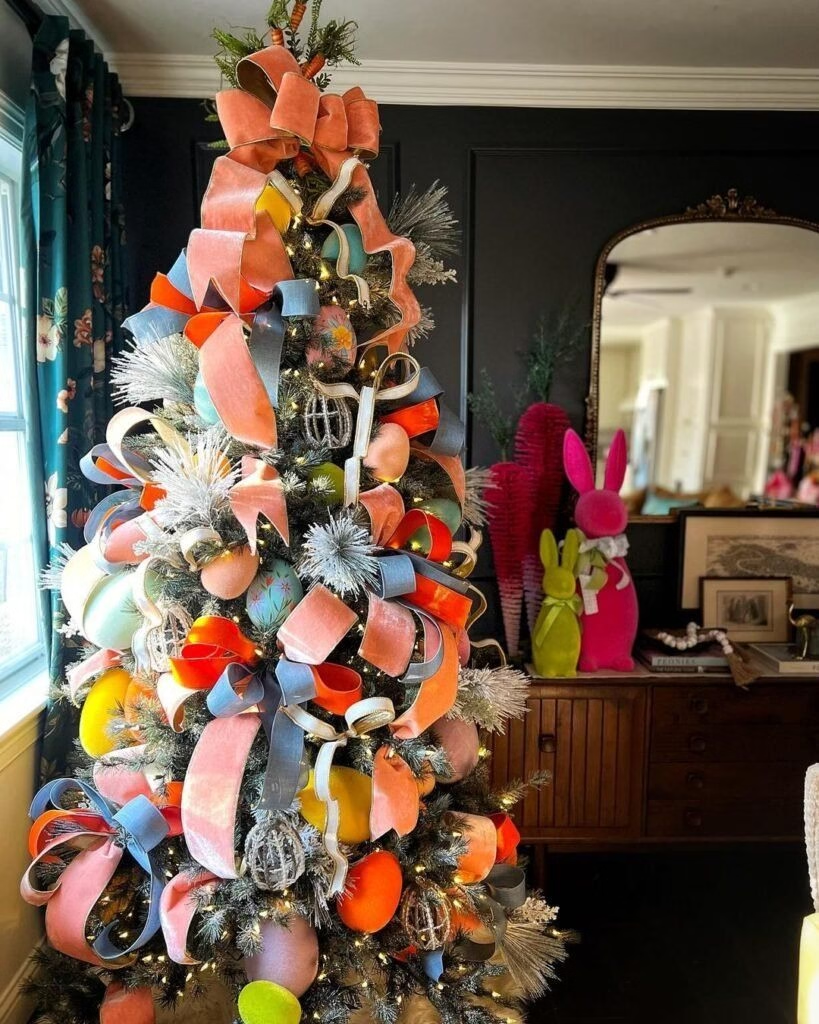
Why This Designer Tree Method Works
- Layered color depth: Mixing deep jewel tones with a lighter neutral like champagne or cream keeps the tree rich without looking heavy.
- Mixed textures: Velvet ribbon, glass baubles, matte ornaments, glittered picks and natural pine cones give the eye plenty to explore.
- Ribbon as the backbone: Wide wired ribbon cascading from a statement bow fills gaps between branches and makes even a budget tree look twice as full.
Supplies and Ornaments You’ll Need
- 1 pre-lit artificial tree: A 6- to 7-foot tree with warm white lights. Slim profiles suit smaller rooms.
- 4 types of wired ribbon:
- 4-inch emerald or burgundy velvet ribbon, for the topper bow and cascades
- 2.5-inch gold metallic or plaid ribbon
- 2-inch burgundy or deep red satin ribbon
- 1.5-inch champagne or cream ribbon with gold trim
- Oversized ornaments: Large and medium baubles in emerald, burgundy, gold and champagne, in a mix of glossy, matte and glitter finishes.
- Filler ornaments: Small baubles in the same colors to tuck deep into the branches.
- Picks and sprays: Red berry picks, gold glitter sprays, frosted pine picks and natural pine cones.
- Floral wire or zip ties: To secure bows and heavier ornaments.
How to Decorate a Christmas Tree, Step by Step
1. Fluff the Branches and Check the Lights
Plug the tree in first so you can see how the lights fall on the inner branches and fix any dark spots. Separate every branch tip, fanning some up and some down. This step takes the longest, but it’s what makes an artificial tree look full and real.
2. Build the Topper with Picks and a Velvet Bow
Create the topper before any ornaments go on, so the tree’s proportions are set from the start.
- Tuck a tall cluster of gold glitter sprays and berry picks into the top so they fan out near the ceiling.
- Tie an oversized multi loop bow from the 4-inch velvet ribbon and wire it securely just below the picks.
- Cut long tails from the same ribbon, dovetail the ends by snipping an inverted “V” into each tip, and let them cascade down the front and sides in soft waves.
3. Layer Multi-Ribbon Bundles Through the Branches
Instead of wrapping ribbon around the tree like garland, use the bundled bow and cascade technique:
- Stack the gold, burgundy, champagne and velvet ribbons together.
- Pinch and tie them into multi color cluster bows, then wire them deep into the branches at staggered heights.
- Shape the wired loops so they puff outward, and let the dovetailed tails curl naturally over the branch tips.
4. Tuck Filler Ornaments Deep into the Tree
Push small baubles close to the trunk. They reflect the lights from inside and add depth, so the tree doesn’t look hollow when you step back.
5. Nestle the Oversized Ornaments into the Ribbon Pockets
Large ornaments look awkward dangling from branch tips, so nestle them into the pockets your ribbon waves create:
- Place the largest emerald and burgundy ornaments in the middle and lower sections to anchor the visual weight.
- Add medium gold and champagne ornaments in the upper and middle tiers.
- Spread colors in a diagonal zigzag so no two matching ornaments sit side by side.
6. Finish with Picks and Pine Cones
Fill any remaining gaps with berry picks, frosted pine sprays and natural pine cones. Angle them outward slightly so they break up the tree’s outline and give it a full, gathered from the garden look.
Bonus: Coordinate Your Mantel or Console Table
To make the tree feel like part of the room, repeat its colors nearby:
- Matching garland: Drape a pine garland across the mantel and weave in the same velvet ribbon and a few ornaments.
- Brass candlesticks: Group tapers in burgundy or cream at different heights for warm, flickering light.
- Books and wood beads: Ground the jewel tones with neutral hardcover books topped with a wooden bead garland.
Frequently Asked Questions
How much ribbon do I need for a Christmas tree?
For a 6- to 7-foot tree using the cascade method, plan on about 30 to 50 feet of each main ribbon. Wider ribbon covers more space, so you’ll need less of it than narrow trims.
In what order should I decorate a Christmas tree?
Lights first, then the topper, then ribbon, then filler ornaments, then large ornaments, and finally picks. Setting the topper and ribbon early gives you pockets to place ornaments into.
How many ornaments does a 7-foot tree need?
A common guide is around 10 to 15 ornaments per foot of height, so roughly 70 to 100 for a 7-foot tree. With heavy ribbon layering, you can use fewer and still get a full look.
More Christmas Tree Inspiration
- Festive Christmas Tree Decor Ideas to Spark Holiday Magic
- Sparkly Christmas Tree Decorations for Festive Magic
- 10 Traditional Christmas Tree Inspiration
Share Your Tree
What colors are you decorating with this year? Tell us your palette in the comments, and pin this guide to your Christmas decor board for inspiration.


Pingback: 10 White Flocked Christmas Tree Ideas, Full, Slim and Mini | Time for Creatives
Pingback: 9 Christmas Wreath With Pinecones and Lights for Door and Mantel | Time for Creatives